Self-hosting my home with Home Assistant (part 1)
Even if I’ve been a Home Assistant’s user for quite some time I have never dedicated myself to have a truly stable and dedicated service at home. I always treated it more like a pet project than anything else, but this is changing now.
I have a fair amount of Smart Devices around the house and just as you come to expect they come from different companies, protocols and sizes. Each day it passes I’m more and more concerned about my privacy and the value of the hardware I do not truly own.
With this in mind I have started the journey of self-hosting! Which to put it simply is… every device that is in my home (with a few exceptions that you’ll see later) will be controlled by this Home Assistance instance.
Note: I wanted to install this on a USB Drive, but apparently that’s still not supported for Home Assistant OS, so I’m stuck with an SD Card for now. Some time after starting working on this I heard about
datactlbut I will setup that sometime later.
Base Home Assistant OS using an SD Card
For this just stick to the official documentation. Only download the latest release from github and copy the img card to your SD Card with dd, Balena or the tool of choice.
Put the SD Card on your Pi, turn it on and let’s get started.
Base installation
After booting, you will be welcome with a wizard installation. Just follow the basic instructions to generate the main user/account, and the name and location for your home assistant.
Bonus: Use some website like this to get your elevation if you’re feeling picky.
After that, you will be greeted by something similar to this:

Update the system
Go to your Supervisor tab and check if you have any pending updates.
Moving to MariaDB
The default database backend is SQLite, and that has it’s limitations, so let’s move everything to MariaDB before any other configuration.
- Install the File editor addon from Supervisor > Add-ons > File editor and start it.
- Install the MySQL addon from Supervisor > Add-ons > MariaDB
- Once installed, go to the configuration tab and set a password
- Under the Info tab start the MariaDB Service and enable the Watchdog service
- Go to the file editor interface and edit the
configuration.yamlfile. - Add the configuration for the
recorderintegration:
| |
In this case I also set data to be stored for 90 days and a 5s delay between disk writes (since I’m using an SD Card and their lifespan is not very long with abundant I/O).
More information on the documentation: recorder, history
7. Restart Home Assistant for the changes to take effect under Configuration > Server Constrols > Restart.
Backups
Now another if not the most important of them all, automatic snapshots in case something goes wrong.
Go to Configuration > Automations > Add automation, and in top-right hamburger menu press Edit as YAML.
This configuration will perform a Weekly Snapshot every Monday at 3.00 AM. It is a sensible default once Home Assistant is running, but if you’re going to play with it you may need to consider more frequent backups.
| |
Keep in mind that this snapshots are stored on the /backup folder on the Home Assistant instance, you need to create a way of moving that out of the system. You can use other automation, SCP from another machine or any compatible tool of your choice.
Setting up accounts and users that will use the system
This used to be more complex a while ago, now you only need to go to Configuration > People and add the users you need.
Now you can even add the avatar directly from the interface! Back in the day you required to upload the file and fiddling with YAMLs.
Also, for some options and add-ons to display, you need to enable “Advanced mode” on your user profile page.

SSH Access
Easily handled by an integration, as almost everything with Home Assistant.
For this add-on to show up you need to enable Advanced mode as shown in the previous step.
Just install the Terminal and SSH addon, add your ssh key under the configuration tab under the authorized_keys property, and expose a port for the SSH server on the host. After that Start the service and enable the Watchdog to monitor it in case it fails.
Enable SSL
Even if my home assistant installation is going to be LAN only (using a VPN to have external access) I always setup SSL in all my services and while there are some options when setting this up with Home Assistant, I went the nginx way since that’s what I’m more comfortable with.
Go to Supervisor > Add-on Store and install the NGINX Home Assistant SSL proxy.
Put your files under /ssl connecting to the instance via SSH or using any file editor addon on the store.
Under its Configuration tab, set up the domain and path to the certificate and key files.
| |
There are a number of guides out there to generate self-signed certificates. I have my own Certificate Authority that use to sign certificates for my local services, that way I can just trust my own CA and every dependant certificate will work out of the box.
As a note, for this to work with the companion apps on iOS you need to generate the certificates with pretty specific requisites. Android worked as a charm.
Getting the Home Assistant Companion
Download the application from your phone’s store and after logging in you can setup the sensors to be sent to Home Assistant, this will be linked to your account so you could perform automation with them on the server.
Apart from using the app to control your home devices, the sensors will be useful to generate automation in the future.
Another useful thing to setup here is the local (LAN) address to use when the phone is connected to Wifi at home, using an external hostname when connecting via VPN/RemoteControl.
The first automation: tell me about updates
I use an script to send notifications to all devices (persons) on the house, with the title and message parameter:
| |
And this automation will check when there are any updates and send a notification using the previous script with the version number that just came in:
| |

Add system sensors
I want to control how the Raspberry is doing, so I’m going to enable some system sensors using the systemmonitor sensor.
Edit the configuration.yaml file and add the following:
| |
This requires a Home Assistant restart for the changes to take effect.
I also added a custom lovelace dashboard to monitor everything easily, here is the YAML configuration:
| |
And here’s a preview:

Adding integrations
At this point if you already have devices on your network your Home Assistant will send you a notification like this:
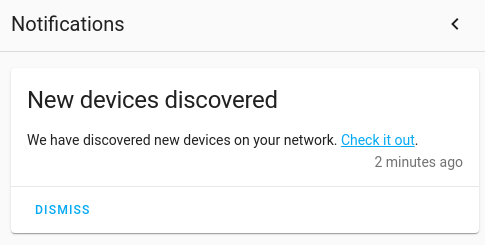
So I’m going to setup the base integrations with the server to start controlling some devices.
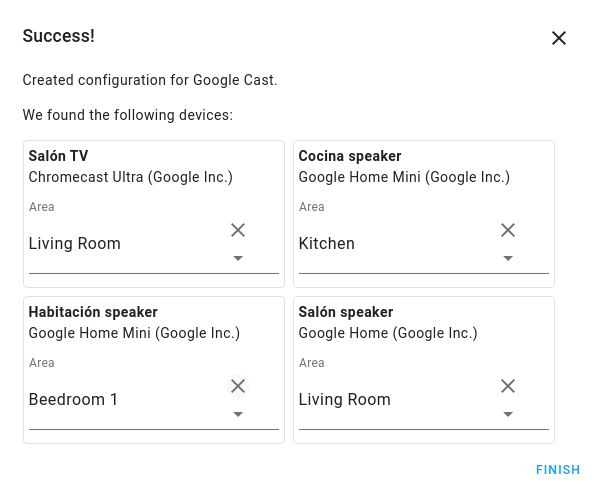
Chromecast
But you said self-hosted! Yeah, yeah… And I want to, but there’s no real alternative to the Cast protocol to self host, the speakers with Chromecast devices are just so convenient…
One of the simplest things to set up, just go to your integrations and add it. It will prompt you to select in which rooms each Chromecast device is and that’s it.
Weather (OpenWeatherMap)
I’m going to use the OpenWeatherMap integration because it provides more sensors than the one setup by default.
You just need to register to the service and enable the integration under Configuration > Integrations > OpenWeatherMap, supply your API key and set the mode to onecall_hourly which will download 3h forecasts each hour, enough for the free tier.
I had to wait for an hour or so until the API Key was valid for the integration to use, it keep saying Invalid API Key until I received a confirmation email for my account.
Phillips Hue
Linking the Phillips Hue is super easy, you only need to add the Hue integration, select the bridge IP from the dropdown (or input one manually) and press the button on the bridge to confirm.
After selecting in which area the bridge and bulbs are in, you’re good to go.
BONUS: Since the comunication is done via LAN with the bridge, the bridge itself doesn’t need internet access to work (as I have mine blocked in my firewall). Also in my case this is only temporal since I will move every Zigbee device to a cluster controlled by Home Assistant.
Tuya (Smart Things)
This is one of the dependencies I have that I’m most eager to get rid off, but for now there are some smart plugs at home that I need to control.
Going to Configuration > Integrations > Add the Tuya is on the list; you need to enter your username, password and country code for the integration to communicate with the Tuya API, so your devices will require internet connection.
The plan is to try and flash the plugs with Tasmota to free them from the cloud and any new ones I’m getting will be Zigbee compatbile with the hopes on having only Zigbee smart plugs at home.
Closing
That was easy!
The folks at Home Assistant have been working on this so good that almost everything can be done from the interface now. I see any normal user working with this mostly plug and play from the UI which is amazing in my opinion.
In future post I will dive into my Zigbee configuration, InfluxDB, ESPHome, Alarms … there’s so much to do!