Journey to K3S: Basic cluster setup
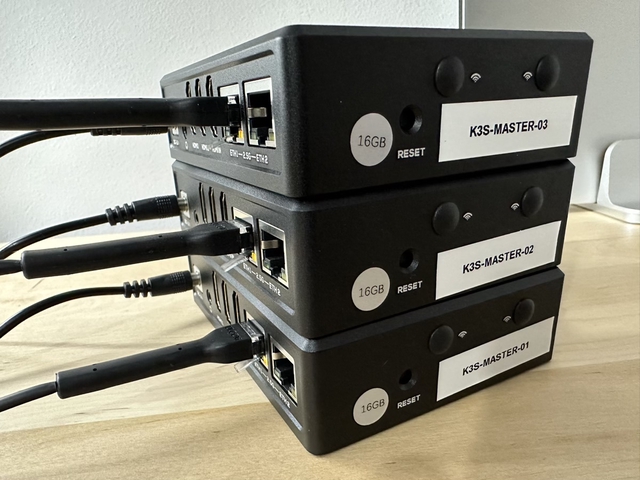
I’ve finally started to play with K3S, a lightweight Kubernetes distribution. I have been reading about it for a while and I’m excited to see how it performs in my home lab. My services have been running in an Intel NUC running Docker container for some years now, but the plan is to migrate them to a k3s cluster of three NanoPC-T6 boards.
I was looking for a small form-factor and low power consumption solution, and the NanoPC-T6 seems to fit the bill. I know I’m going to stumble upon some limitations but I’m eager to see how it goes and the problems I find along the way.
My requirements are very simple: I want to run a small cluster with a few services, and I want to be able to access them from the internet and from my home. My current setup relies on Tailscale for VPN and Ingress for the services, so I’m going to try and replicate that in this new setup.

Installing DietPi on the NanoPC-T6
I’m completely new to DietPi, but nothing that FriendlyElec offered seemed to fit my needs. I’m not a fan of the pre-installed software and I wanted to start from scratch. I tried to find compatible OSs around and there weren’t many, but DietPi seemed to be a good fit and it’s actively maintained.
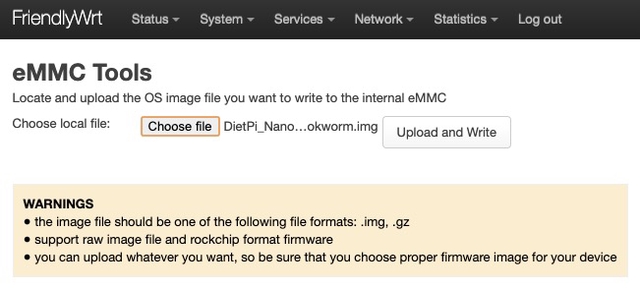
At first I tried to run from an SD Card and try and copy the data manually, but I found out that the NanoPC-T6 has an eMMC slot, so I decided to go with that. I flashed FriendlyWRT into the SD Card, booted it and used their tools to flash DietPi into the eMMC.
For this to work properly under my home network setup I had to physically connect a computer and a keyboard to the boards and disable the firewall service using:
service firewall stop. I believe this happened because the boards live in a different VLAN/subnet in my local network since I connect new devices to a different VLAN for security reasons. With that disabled I could access the boards from my computer and continue the setup.

Setting up the OS
The first thing once you SSH to the boards is to change the default and global software passwords. Once the setup assistant was over I setup a new SSH key and disabled the password login.
Before installing K3s I wanted to make sure the OS was up to date and had the necessary tools to run the cluster. I used the dietpi-software tool to be sure that some convenience utilities like vim, curl and git where present.
I also set up the hostname by using the dietpi-config tool to k3s-master-03, k3s-master-02 and k3s-master-03 for the three boards.
And installed open-iscsi to be prepared in the case I end up setting up Longhorn.
Setting up the network
I’m using Tailscale to connect the boards to my home network and to the internet. I installed Tailscale using dietpi-software and link the device to my account using tailscale up.
I also set up the static IP address for the boards using my home router. I’m using a custom pfsense router and I set up the IP address for the boards using the MAC address of the boards on the VLAN they are going to reside in.
Installing K3S
I followed the official documentation to create an embedded etcd highly available cluster.
I’m not a fan of the
curl ... | shinstallation methods around, but this is the official way to install K3S and I’m going to follow it for convenience. Always check the script before running it..
I created the first node using the following command:
1curl -sfL https://get.k3s.io | K3S_TOKEN=<token> sh -s - server --cluster-initI used the
K3S_TOKENenvironment variable to set the token for the cluster that I will need to join the other two nodes to the cluster. Since this is the first node of the cluster I had to provide the--cluster-initflag to initialize the cluster.I joined the other two nodes to the cluster using the following command:
1curl -sfL https://get.k3s.io | K3S_TOKEN=<token> sh -s - server --server https://<internal ip of the first node>:6443Done! I have a three node K3S cluster running in my home lab. Is that simple.

Checking that it works
I’m going to deploy a simple service to check that the cluster is working properly. I’m going to use the nginx image and expose it using an Ingress:
Create the
hello-worldnamespace:1kubectl create namespace hello-worldCreate a simple index file:
1echo "Hello, world!" > index.htmlCreate a
ConfigMapwith the index file:1kubectl create configmap hello-world-index-html --from-file=index.html -n hello-worldCreate a deployment using the
nginximage and the config map we just created:1 2 3 4 5 6 7 8 9 10 11 12 13 14 15 16 17 18 19 20 21 22 23 24 25 26 27 28 29kubectl apply -f - <<EOF apiVersion: apps/v1 kind: Deployment metadata: name: hello-world-nginx namespace: hello-world spec: selector: matchLabels: app: hello-world replicas: 3 template: metadata: labels: app: hello-world spec: containers: - name: nginx image: nginx ports: - containerPort: 80 volumeMounts: - name: hello-world-volume mountPath: /usr/share/nginx/html volumes: - name: hello-world-volume configMap: name: hello-world-index-html EOFCreate the service to expose the deployment:
 1
 2
 3
 4
 5
 6
 7
 8
 9
10
11
12
13
kubectl apply -f - <<EOF apiVersion: v1 kind: Service metadata: name: hello-world namespace: hello-world spec: ports: - port: 80 protocol: TCP selector: app: hello-world EOFCreate the Ingress to expose the service to the internet:
 1
 2
 3
 4
 5
 6
 7
 8
 9
10
11
12
13
14
15
16
17
18
19
20
kubectl apply -f - <<EOF apiVersion: networking.k8s.io/v1 kind: Ingress metadata: name: hello-world namespace: hello-world spec: ingressClassName: "traefik" rules: - host: hello-world.fmartingr.dev http: paths: - path: / pathType: Prefix backend: service: name: hello-world port: number: 80 EOF
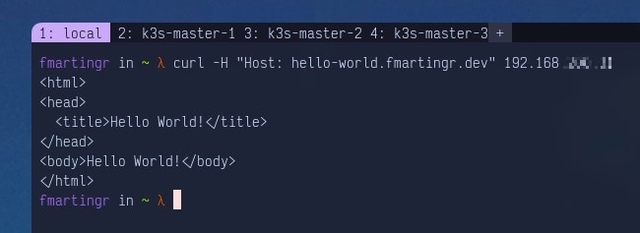
Done! I can access the service from my local network using the hello-world.fmartingr.dev domain:

That’s it! I have a cluster running and I can start playing with it. There’s a lot more to be done and progress will be slow since I’m doing this in my free time to dogfood kubernetes at home.
Will follow up with updates once I make more progress, see you on the next one.